This tutorial has the primary purpose to introduce customers of aifosDesign material textures how to use them in Unreal Engine, but the suggested workflow should apply to any texture set stored in linear (gamma=1.0) OpenEXR format (.exr). The example materials used are Textures – Lawn Grass 2 and Textures – Gravel and Sand.
While the tutorial is openly aimed towards artists fairly new to Unreal Engine – to ensure that customers not proficient in the engine are still able to use the aifosDesign material textures supplied to them – the first section of the tutorial (covering downloading of the textures, creating a project from a template, disabling Realtime rendering in viewport, creating a folder and importing the textures, as well as adjusting the Texture Streaming Pool Size) might be far too basic for users having a firm grasp of the engine. If you want to jump straight to selecting proper Compression Settings for the imported textures with Bulk Edit via Property Matrix, before setting up a rudimentary Master Material, please click here.
The screenshots included in this tutorial are from a macOS version of Unreal Engine 4.25.3, but the instructions themselves are made with Windows as "mother tongue" – however, the tutorial should be interpretable for users of all UE4-compatible platforms.
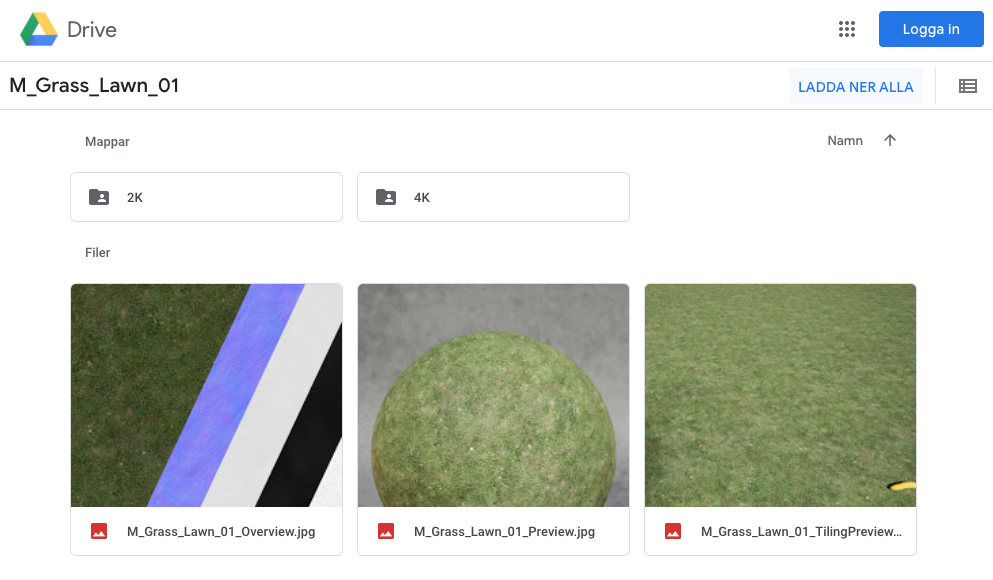
First, make sure to download the material textures provided. After following the link made available after purchase, press the Download all (or applicable translation) button to let Google compress all files in a ZIP archive before downloading, or cherry-pick the textures you need for your specific workflow. For the sake of this tutorial, we will download all files.
The tutorial takes for granted that you have installed Unreal Engine to your computer, and for the sake of standing on common ground, we will create a new project from a template. If you already have a project you want to add the material textures to, please open that instead. In any case, launch Unreal Engine.
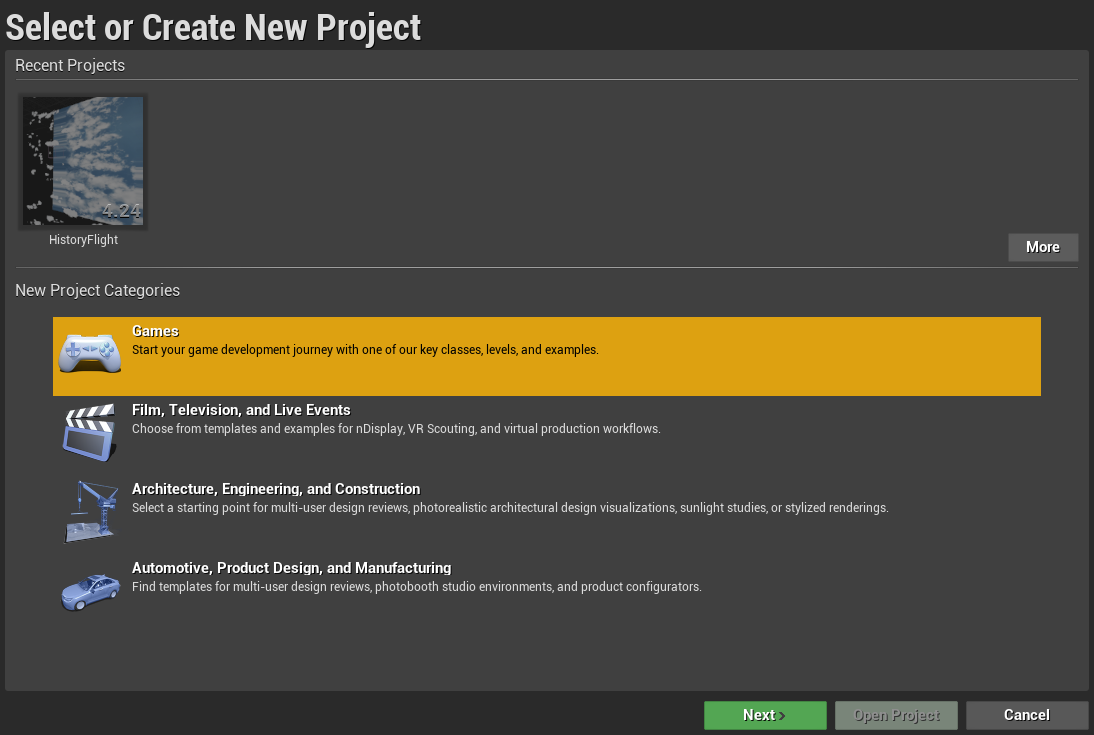
For the template, we will create a Game Project...
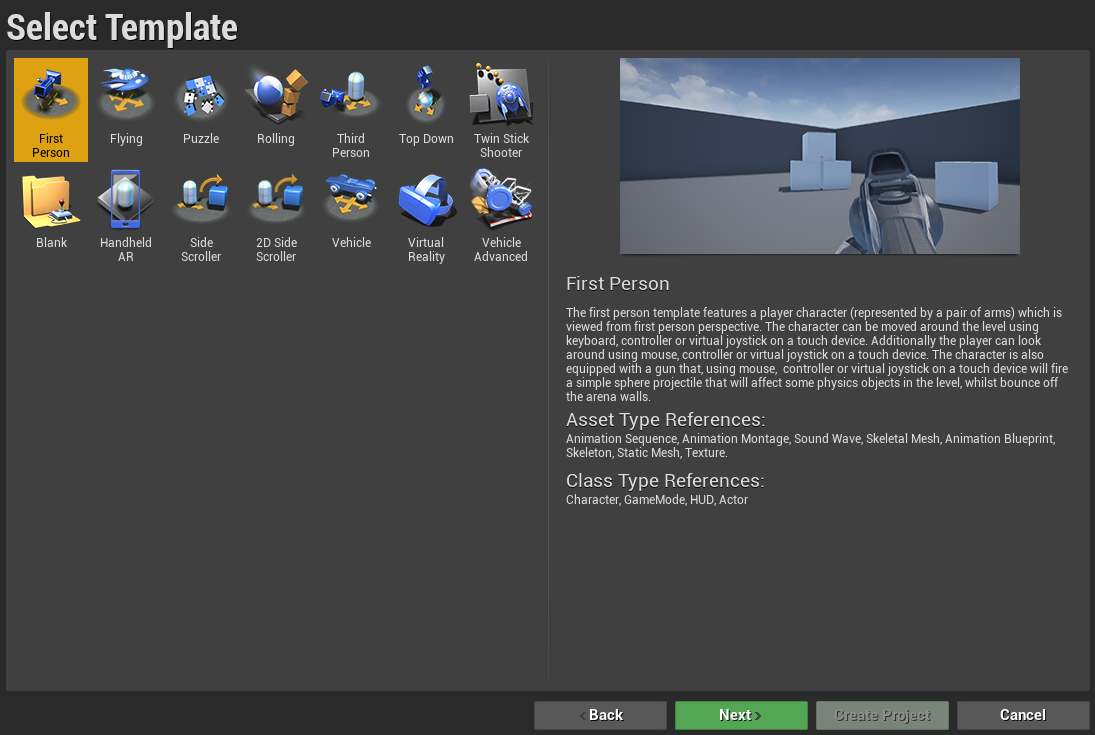
...and use the First Person template.
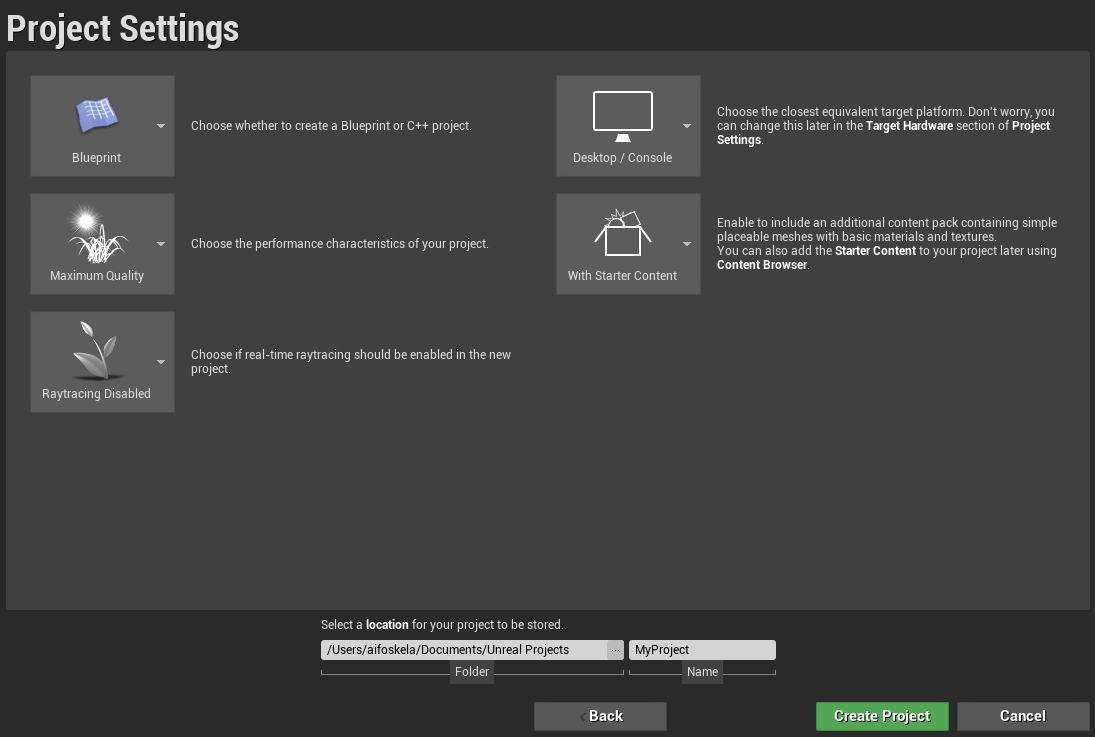
For the Project Settings, we leave everything at default and create the project in a directory of your choice, with a name chosen for general longevity rather than specificity (Unreal Engine projects are notoriously difficult to rename post-creation without risking dependency errors, which is why both Valorant and ARK: Survival Evolved still keep the internal project name "ShooterGame" [from the free Learning template they both originate from]).
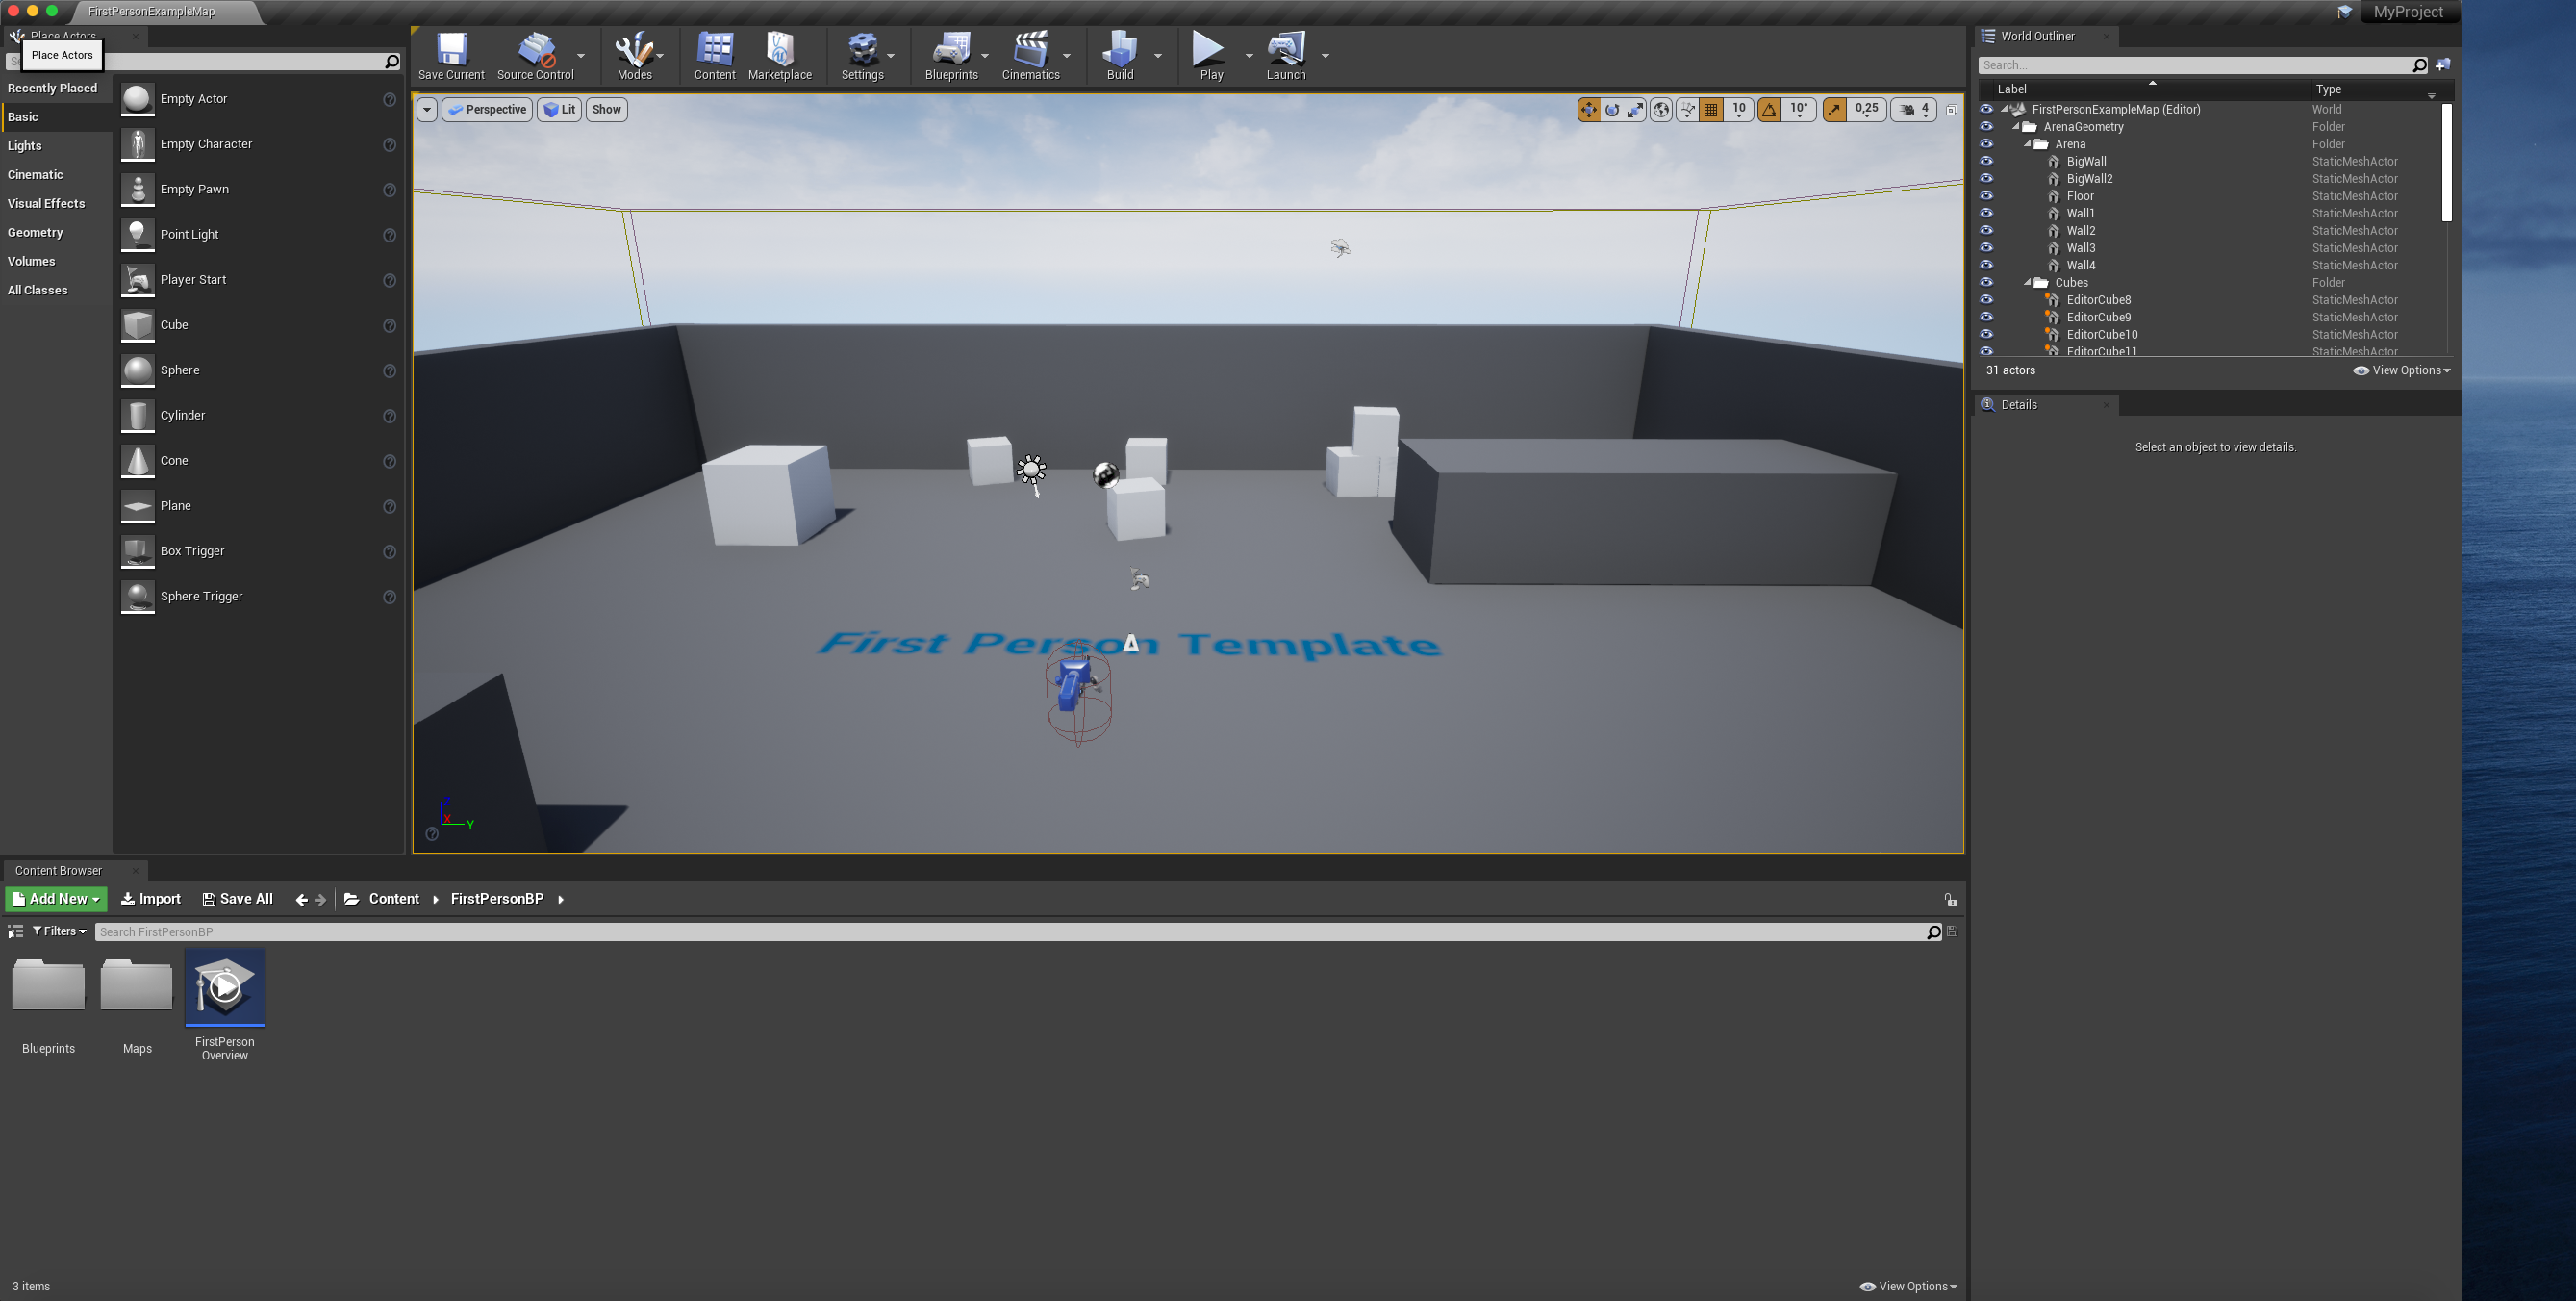
When the project has launched, you may be greeted with a small popup informing that "New plugins are available", and another one notifying that shaders are compiling. For now, you may dismiss the plugins popup (however, it is recommended that you enable those plugins you determine you need in your project as soon as possible, as enabling some plugins will force all shaders to recompile, which is a time-consuming task dependent on the CPU) and allow the shader compiling to complete. While you wait, you may disable Realtime rendering in the viewport (primarily to lighten the load on the GPU, since with Realtime disabled, the viewport only refreshes while actively maneuvering in it, keeping the last rendered frame when stationary).
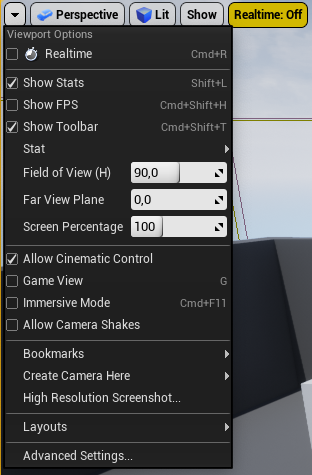
Realtime rendering of the viewport is disabled by clicking the down-pointing arrow in the top left corner of the viewport, and unchecking Realtime (by the stopwatch icon), or simply by pressing CTRL+R with the viewport active.
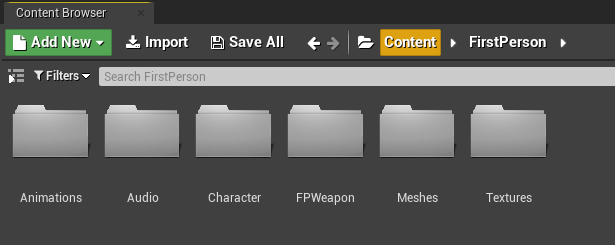
With the First Person template, your default start location in the Content Browser is the FirstPerson folder. To maneuver upwards in the folder hierarchy, simply click the breadcrumb Content, which practically is the root folder of your project. If you implement Unreal Engine Marketplace assets to the project, by adding them from the Epic Games Launcher interface, it is here the individual folders will appear. It is recommended that you early on in a project decide upon a folder structure which suits the project in its long-term development, since proper organization of files in relevant folders is way easier to setup initially and maintain, as opposed to attempts of reorganizing an incoherent mess later on.
If you create a folder structure before populating the folders with files, please note that Unreal Engine does not recognize empty folders after restart, so make sure to add a single provisional "dummy" file in each empty directory (or at least in each lowest-hierarchy directory – a file in Content\Environment\Nature\Foliage\ will retain all intermediate folders as well). The dummy file can be an empty Actor, or (since it require fewer clicks) an empty Particle System (simply RMB-click in the directory and select it to add it).
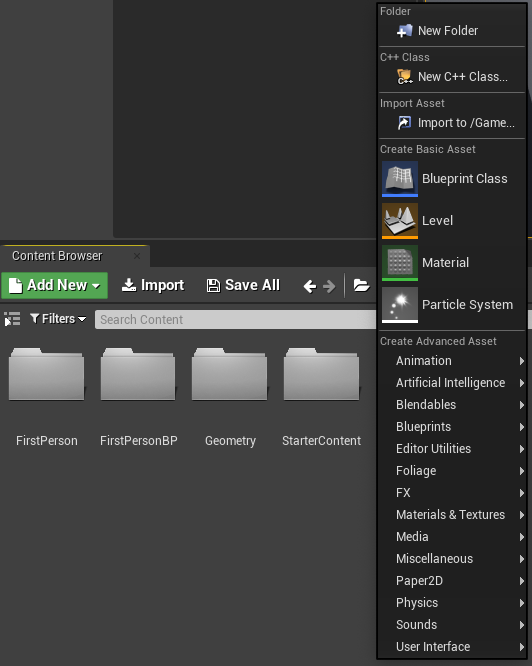
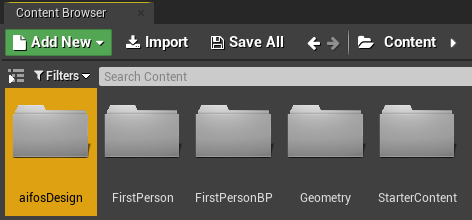
Since we for the scope of this tutorial only will add some textures and create a couple of materials, it is not excessively disorganized to simply create a single new subfolder in the Content folder, named after the source of the soon-to-be-imported textures, and place all files there. Would we know that we will import a lot of assets into the same source folder, then we might have good reason to create a more sofisticated folder structure preemptively. All subfolder names in a hierarchical chain, including the file name, contribute to the path length of files, which has a maximum character count of 260. It is therefore virtous to be concise when naming folders, and not create unnecessary subfolders for files when no further distinction is needed, but nevertheless not sacrifice clarity and order for a slightly shorter path length when chaos can be preemptively avoided by virtue of a few additional subfolders. We create a new subfolder in the current directory (Content) by RMB-clicking and select New Folder.
The newly created folder will immediately after creation allow for it to be renamed. We rename it to the designated name, and press ENTER to confirm. If the renaming is erroneous or prematurely cancelled by mistake, F2 will make any selected folder or file active for renaming again.
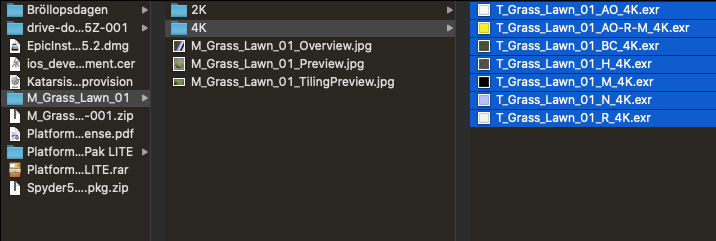
Switching to File Explorer (or Finder) and navigating to the downloaded texture files, we select and then click-and-drag the files we want to import into the Unreal Engine Content Browser folder we just created. Importing may take a short time, depending on the file size of the imported files. For the sake of this tutorial, we will import all available textures of 4K resolution.
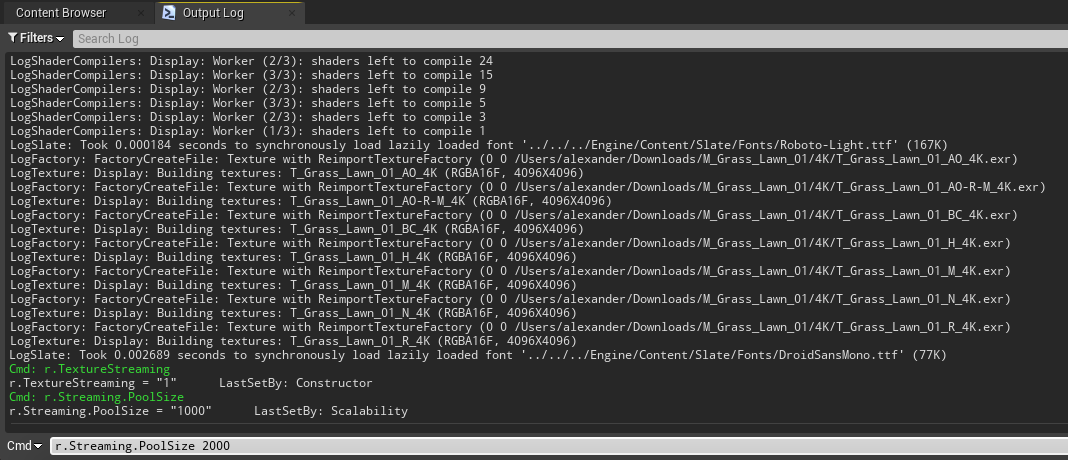
When the texture files are imported, you may encounter an error, declaring: TEXTURE STREAMING POOL OVER XXX.XXX MiB BUDGET. This is primarily due to the textures being automatically imported with too high-end Compression Settings, bloating their file sizes and choking the budgeted allocation of the GPU's memory. The effect of this is that materials which at a certain viewing distance would be rendered in full resolution of their texture bitmaps instead will be rendered with lower-resolution mip-maps (lower-resolution versions of the same file, automatically generated as long as the original file adheres to a power-of-two resolution), so that they take up less resources of the GPU memory budget.
We will shortly fix the root of this by adjusting the Compression Settings of the imported textures to a more reasonable level. However, if the problem persists, or reoccurs after more material textures are used, the Texture Streaming Pool budget is also easily increased, as long as your GPU's GDDR memory amount allows for it (if you are unsure how much dedicated GPU memory you have, Run [WINDOWS+R] "dxdiag" and check the value for "Display Memory (VRAM)" under your primary graphics card's Display tab – be sure to allocate less MBs than this to the Texture Streaming Pool, with a fair margin, to avoid crashes).
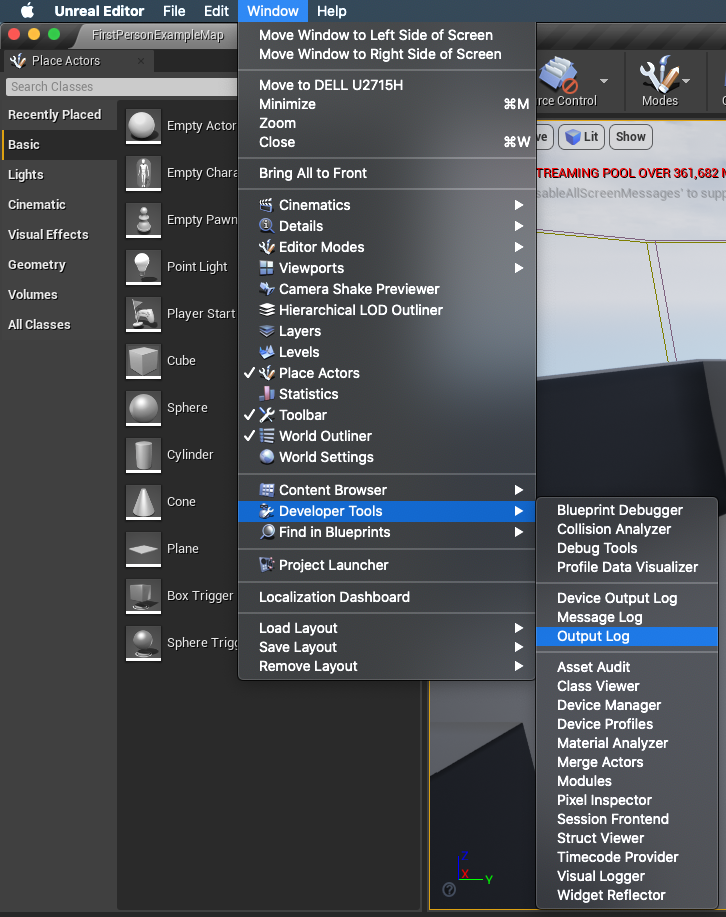
If you click Window\Developer Tools\Output Log, you will open the Output Log. While you can enter Console commands through a direct input interface, reached via a keyboard shortcut (usually the § tilde key, but not for all localizations), if you enter it in the Output Log, you can more clearly see the effects of your inputs, as well as check the current value of any console variable. For Boolean variables, 0 is False and 1 is True.
The syntax is very easy – simply enter the name of the console variable you want to change (without spaces, and with . period as hierarchical separator – the input window will expand with a list of matching variables as you enter your input, functioning like a dynamic search field), add a space, and then enter the numerical value (integer) you want to set the variable to. If you want to check the current value of the variable, simply enter only the name of it.
Enter r.Streaming.PoolSize to check the current value of the variable. Then enter r.Streaming.PoolSize XXXX, with XXXX being replaced by a significantly higher value than the originally set one, guided by the amount of budget overencumbrance the error warns about (in this case, the budget was exceeded with about 361 MB, and increasing the value from 1000 to 2000 would solve the error by a far margin).
Due to the textures being saved in a losslessly compressed OpenEXR format, with inherent linear gamma (gamma=1.0) and (half-precision) floating-point values, Unreal Engine will by default import these textures with (for most practical applications) excessively high-end Compression Settings. If left unrevised, the textures would take up very much space – both in any compiled build of the project and in the graphics card's memory when rendered.
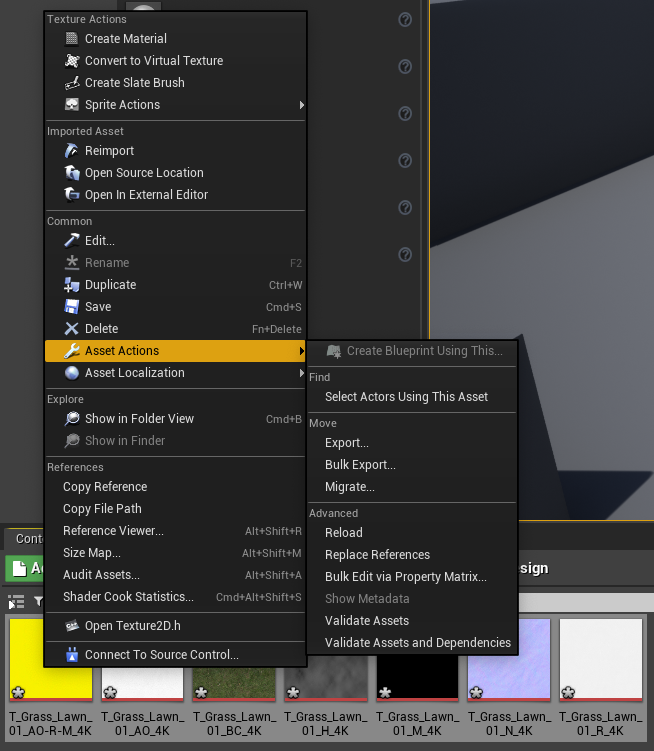
For this tutorial, we have imported all of the textures of 4K resolution, but for your particular workflow, only a relevant selection would have been imported (e.g. the Ambient Occlusion-Roughness-Metallic texture is redundant when the separate Ambient Occlusion, Roughness and Metallic textures are used, and vice versa). Nonetheless, select all imported textures, RMB-click and select Asset Actions\Bulk Edit via Property Matrix.
As seen above, all the OpenEXR texture files are by default imported with HDR Compression settings. This is excessively high-end for most practical scenarios. While the HDR Compression Setting is virtually without compression, the visible deterioration in visual quality when choosing a more aggressively compressed setting is primarily noticeable when comparing side-by-side – for most natural encounters of the material textures, in-game and in-editor, one would not notice that a compressed texture is a less faithful representation of the original file than an uncompressed texture. However, the differences in texture size are very significant, as evident by the table below, where all the Texture Compression Settings are listed, along with their approximate relative weight (as per our experience), with the Default setting's compressed size as 1:
Default: 1
Masks: 1
Alpha: 1
Normalmap: 2
Grayscale: 2
Displacementmap: 2
DistanceFieldFont: 2
BC7: 8
VectorDisplacementmap: 8
UserInterface2D: 16
HDRCompressed: 16
HDR: 16
While not delving into the depths of the different compression methods used for the above settings (if you want a deeper understanding, please read this article – it is a source of our standpoints), one can clearly see that there is great opportunity in picking a correct setting – one would fit 16 (size-equivalent) textures of Default/Masks/Alpha setting on the same portion of the GPU's memory as one single texture with the HDR setting! There are some quirks about some of the Compression Settings, like Alpha being significantly less compressed than Masks, while retaining the same texture size, but requiring a single-channel greyscale texture file. Conversely, Masks allows for different textures packed to its separate channels to be used independently, retaining the same texture size as Alpha, while being more compressed (which rarely is noticeable, if not comparing side-to-side). Default allows for linearly saved texture files to be interpreted as sRGB, so as to render them in perceptual colour space.
Selecting the relevant texture files (CTRL+click to select multiple), change Compression\Compression Setting to Masks for channel packed textures (e.g. Ambient Occlusion-Roughness-Metallic), to Alpha for separate greyscale textures (e.g. Ambient Occlusion, Roughness, Metallic, Displacement [Height], Opacity [Alpha]), to Default for three-channel colour textures (Base Colour [Albedo], Emissive, Subsurface Scattering), and to Normalmap for Normal textures. Each change of settings takes some time, due to the texture being recompressed in-engine. If you do not want to wait many smaller waiting times, but instead one much longer, you may initially check the option Defer Compression with all textures selected. This will postpone the recompressing until the saving of the textures. Remember to check sRGB for any three-channel colour texture imported (for this tutorial, it only applies to the Base Colour texture). One might object that the Displacement texture is compressed as Alpha instead of Displacementmap, but personally we prefer a texture compressed to half the relative size. If the result of the Displacement is inadequate (e.g. stepping or banding occurs, when the number of bits is not enough to accurately reflect smooth transitions of values in the texture), the compression settings for that specific texture can be adjusted later on. When every texture is assigned an adequate Compression Setting, you may save all textures with CTRL+SHIFT+S, which saves all files. Then you may close the Property Matrix Window.
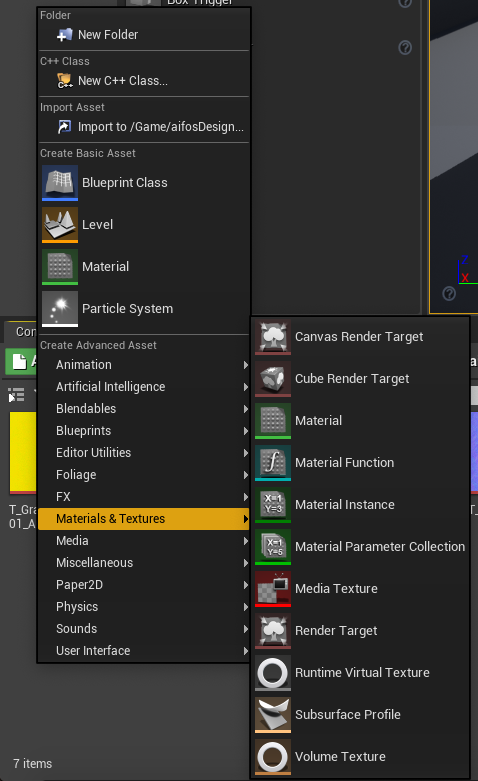
Now it's time to create a Master Material – however rudimentary the material might be. RMB-click in a suitable folder location, and create a new Materials & Textures\Material. Name the material as you see fit (for a Master Material, it is suggested to include "Master" in its name, to make it easily searchable when assigning a parent to a Material Instance).
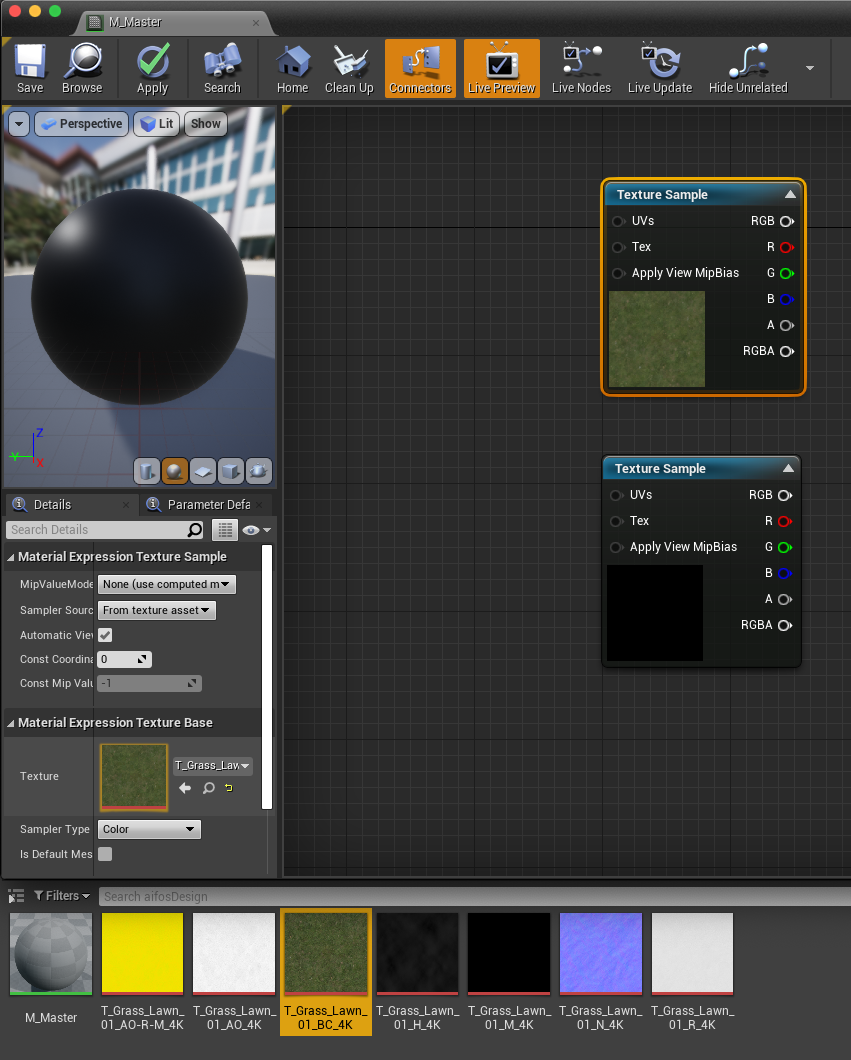
Open the material you just created. Hold T and click anywhere in the Material Blueprint to add a Texture Sample node. Select it, and assign a relevant texture file to it by dragging one from the Content Browser to the highlighted destination in the Texture Sample's Details pane. Alternatively, select the texture in the Content Browser, and click the left-pointing arrow by the same Texture slot – this too will assign the selected texture to the Texture Sample node. Repeat this so as to create and assign textures to as many Texture Sample nodes as there are textures in your preferred workflow. It is not uncommon to omit the Ambient Occlusion texture if your project is dynamically lit (since AO textures in Unreal Engine are only multiplied with baked lightmaps and sky lights of stationary mobility – if your skylight is moveable, it will not take any AO texture into account; furthermore, directional lights produce lighting not applicable for AO, since they either light a triangle or shadow it, which would make the multiplied effect of AO of insignificant effect).
When you assign a texture to the Texture Sample, it will automatically change its Sampler Type to the relevant setting for the assigned texture – defined by its Texture Compression Setting. A texture with Default compression and sRGB checked will be sampled as Color, etc.
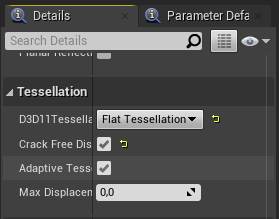
If you want to use Displacement (i.e. offsetting of vertices in the direction of the vertex normal [perpendicular to the tangent]), it is a prerequisite to enable Tessellation for the material (so as to allow the mesh to be locally subdivided, and the subdivided vertices to be displaced more faithfully to the Displacement texture than only those of the unsubdivided mesh). This is done in the Details pane of the Material blueprint itself, so deselect any selected node by clicking in the void, and scroll down to Tessellation. For the most straightforward implementation of Tessellation, change the value of D3D11Tessellation to Flat Tessellation, check the option for Crack Free Displacement (reduces displaced seams between UV islands), and keep Adaptive Tessellation checked. This relinquishes control of the Tessellation Multiplier for the material, but allows the engine to adaptively handle it for you. If you do not use a Displacement texture in your workflow, then there is no reason to activate Tessellation.
For this tutorial's rudimentary Master Material, we use the channel packed texture file for Ambient Occlusion-Roughness-Metallic instead of the separate texture files. This reduces the amount of graphics memory the material's textures occupy, in comparison to three different texture lookups for separate Texture Samples, but it is good to remember that if both the AO and Metallic textures are consistently omitted (e.g. due to using dynamic lighting as well as dealing only with completely metallic/dielectric materials), then there is no texture lookup count advantage anymore, and therefore better to use only the separate Roughness texture instead (since it is more faithfully compressed as Alpha, while having the same resource size).
Parenthesis: if omitting both AO and Metallic, the AO input can be left unconnected, since it defaults to 1 (and multiplication by 1 is of no arithmetic effect), and the Metallic input can either be left unconnected – which means that the default value of 0 only supports dielectric (non-metallic) Material Instances to be parented to this Master Material – or hooked up with a Static Switch Parameter (RMB-click in the Material blueprint void and begin to enter the name of it, and the search results will soon narrow down to it), renamed to "bMetallic" or similar ("b" stands for "Boolean", and is a prefix generally added to parameters which can only be true or false). With one Constant (hold 1 and click to create a Constant node) attached to each of its inputs, with one of value 1.0 attached to True, and the other of value 0.0 attached to False, any child Material Instance can check the parameter "bMetallic" to render the material as metallic, and uncheck it to render it as dielectric.
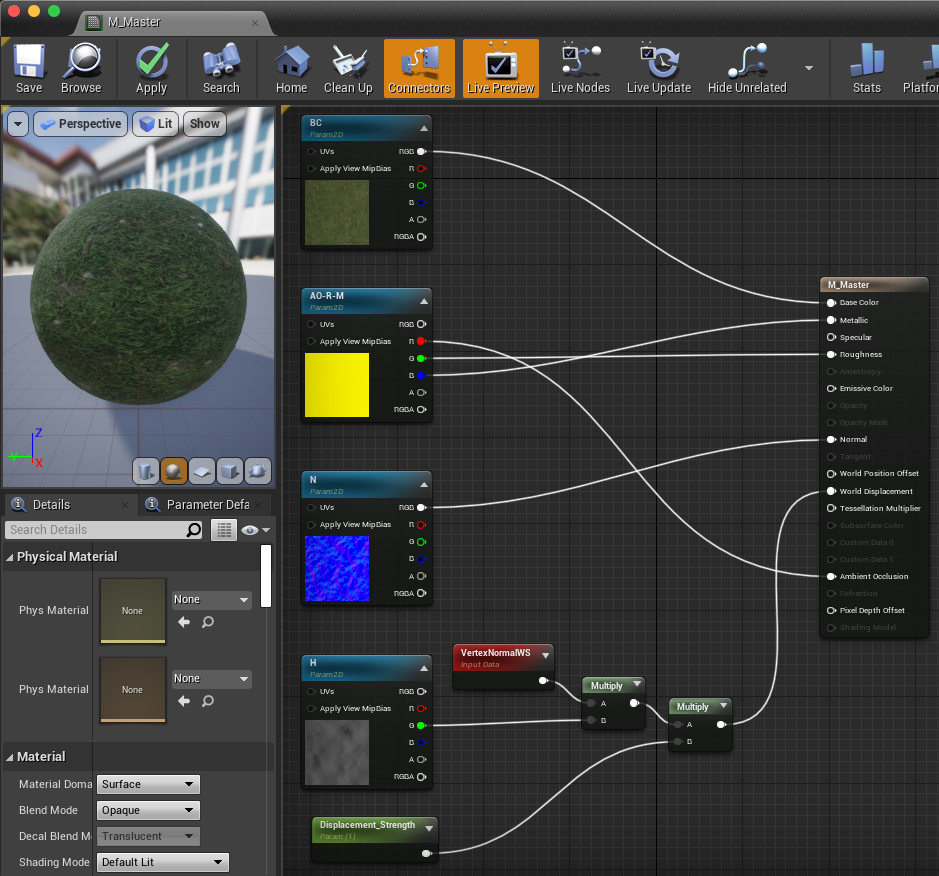
Now, for this tutorial, the very basic Master Material (actually, right about the most basic possible with the given textures involved) has four Texture Samples, and each has a relevant texture file assigned to it (Base Colour [Albedo], Ambient Occlusion-Roughness-Metallic, Normal and Displacement [Height]). To allow for Material Instances to inherit the properties of the parent Material but also to change the sampled textures (which is the point of separate Material Instances with a shared Master Material parent – having only to compile one Material's shader instructions, and using the compiled logic of the parent inherited to its children to render many different variations of it, by changing the values of exposed parameters), we will need to convert the Texture Samples to parameters. This is thankfully very easy: simply RMB-click on any Texture Sample, and select Convert to Parameter. After the conversion, enter a name for the parameter (e.g. "T_BaseColour", "BaseColour", or simply "BC"). Then repeat for the rest of the Texture Samples. It is of utmost importance to remember that distinct parameters must be named uniquely – two parameter nodes sharing the same name will be treated by the engine as instanced copies of each other (reflecting forward changes on any node to the other), which should be avoided if not consciously intended.
When all Texture Samples have been converted to properly named parameters, we can begin to connect the outputs of the sampled textures to the inputs of the Material node. For Base Colour and Normal, it is most straightforward: simply drag the RGB output to the Base Color and Normal inputs, respectively. For the channel packed texture, we drag the Red output to Ambient Occlusion, the Green to Roughness, and the Blue to Metallic.
For the Displacement texture, it is a little bit more complicated. First, we RMB-click and enter "VertexNormalWS" and add such a node. This collects the normal directions (i.e. the positively perpendicular direction to the tangent) of all vertices (of the mesh with the material assigned to it) in world space, which is necessary to make sure that the Displacement is oriented perpendicularly to the surface, instead of offsetting the whole surface in one general direction. By holding M and clicking, add a Multiply node (which simply computes said arithmetic) and connect the VertexNormalWS node to one of the Multiply node's inputs, and the Green output of the Displacement texture node to the other. This would have been sufficient for a ridiculously rudimentary Master Material, but the effect of the Displacement would have been barely noticable, and without possibility to alter. Therefore we add a Scalar parameter to control the strength of the Displacement, and multiply the normal-oriented Displacement with it by virtue of another Multiply node (to copy a node, select it and press CTRL+W). To add a Scalar parameter, either RMB-click and search for it, S+click, or create a Constant (by holding 1 and clicking) and RMB-click on it to select Convert to Parameter. Whichever way chosen, name it adequately (e.g. "Displacement_Strength"). Drag the product of the last Multiply node to the World Displacement input of the Material node.
Like previously stated, this Master Material is really rudimentary and not much to hang in the Christmas tree. But we hope that it demonstrates how to properly sample the imported textures in a Master Material. For the material to be more sufficient for practical use, it would need at least parametrized control over the tiling of the textures. For that, you would add a TextureCoordinates node (U+click), create a new Scalar parameter (S+click) named "Tiling", and multiply the two in a new Multiply node (M+click), and then connect the multiplied output to all Texture parameters' UV input. An implementation of a parameter to control the intensity of the effect of the Normal texture would not hurt, either, but is beyond the scope of this tutorial – which has a primary focus on an adequate implementation of the textures themselves, and not on the material they are implemented in. The authoring of a Master Material is an art not mastered in a single tutorial.
Another parenthesis: why specifically use the Green channel of a greyscale texture? The answer lies in the secrets of compression methods referenced above: with BC1 compression, used for Default and Masks Texture Compression Settings, the Red and Blue channels are compressed to 5 bits, and the Green channel to 6 bits, and thus the Green channel retains more fidelity to the original texture file when compressed. However, the Alpha Texture Compression Setting uses BC4, with a solid 8 bits for all three channels (although requiring all channels to have the same information, so in effect a greyscale texture), so the answer really is that it does not matter whether sampling a greyscale texture from the Red, the Green or the Blue channel (as long as it is compressed as Alpha), but that it is a coherent way to remind oneself that for the most compressed textures, the Green channel is the most accurate one (which is why the Roughness texture [being the most important of the three] is stored in the Green channel in the channel packed texture file, compressed as Masks).
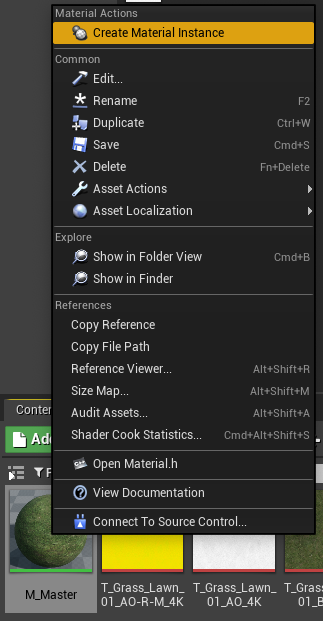
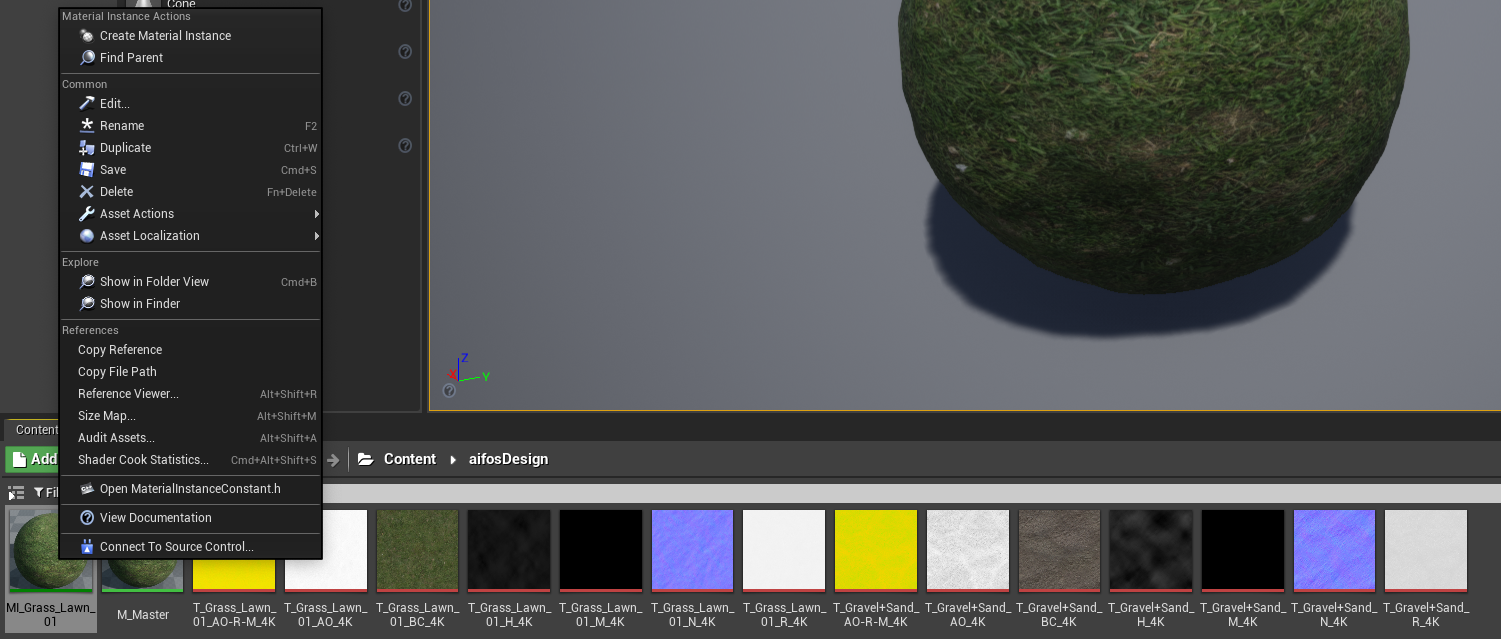
With the Master Material completed, in its rudimentary form, Save (CTRL+S) the material. Saving a material will automatically Apply it, and when you apply it, it will compile all its shaders. With the Master Material saved, RMB-click on it in the Content Browser and select Create Material Instance. Like previously stated, a Material Instance is a child to its Material parent, inheriting all its properties and shader logic, while allowing for separate customization by setting custom values of all parameters inherited from the parent. Since the parent Material's shader instructions has already been compiled, and the Material Instance child only can alter the values of inherited parameters which shares the same already-compiled logic, the parameter values of the Material Instance can be changed back and forth without prompting a recompilation of shaders – for its practical in-editor use, this is Material Instances' true strength, due to saving so much time by reducing shader compilation time during the work day (which otherwise, with relatively outdated processors like ours, can result in such a demoralizing time sink). Additionally, it encourages a more streamlined approach to the use of materials, so that not everything is reinvented for each new entity, but all materials of a certain quality instead share the inherited properties of what should be common to them. There should not be one Master Material to cover all possible opportunities for the full diversity of materials, but one for each group of materials which are sufficiently alike, sharing the logic which brings them together and with parameters allowing for the differences which separate them. Anyway, let us refocus on the Material Instance.
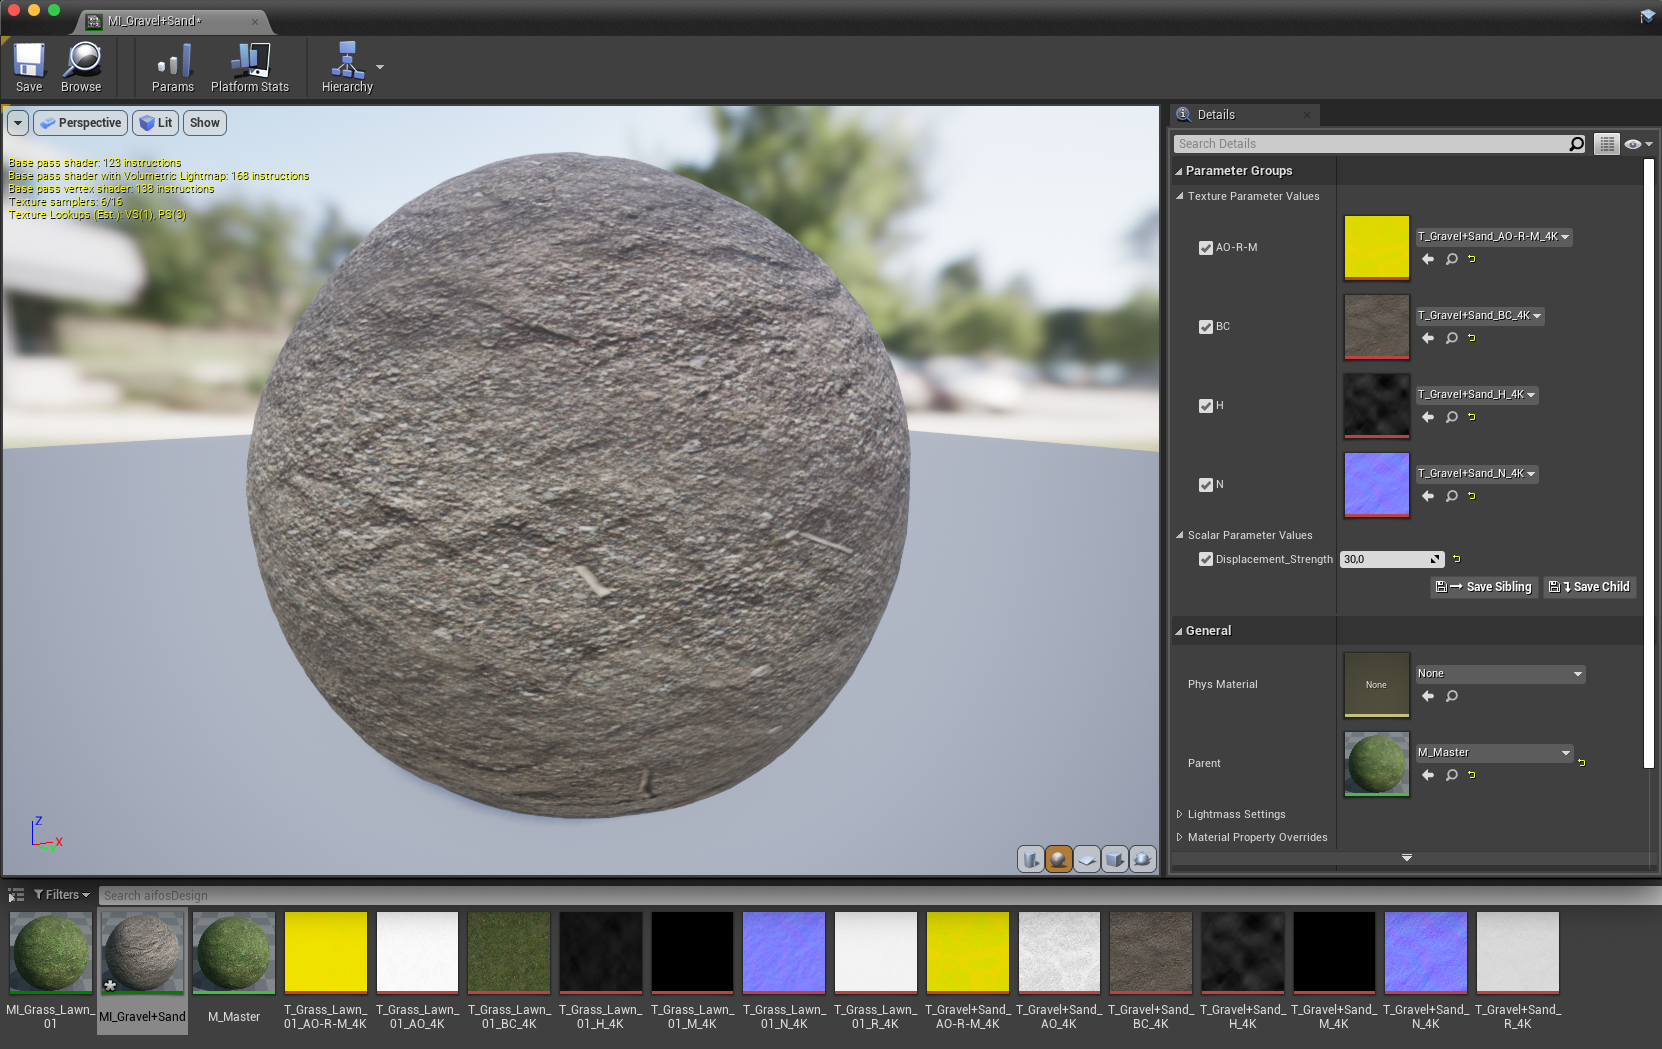
Rename the Material Instance adequately (e.g. "MI_NameOfMaterial"). Open the Material Instance by double-clicking on it.
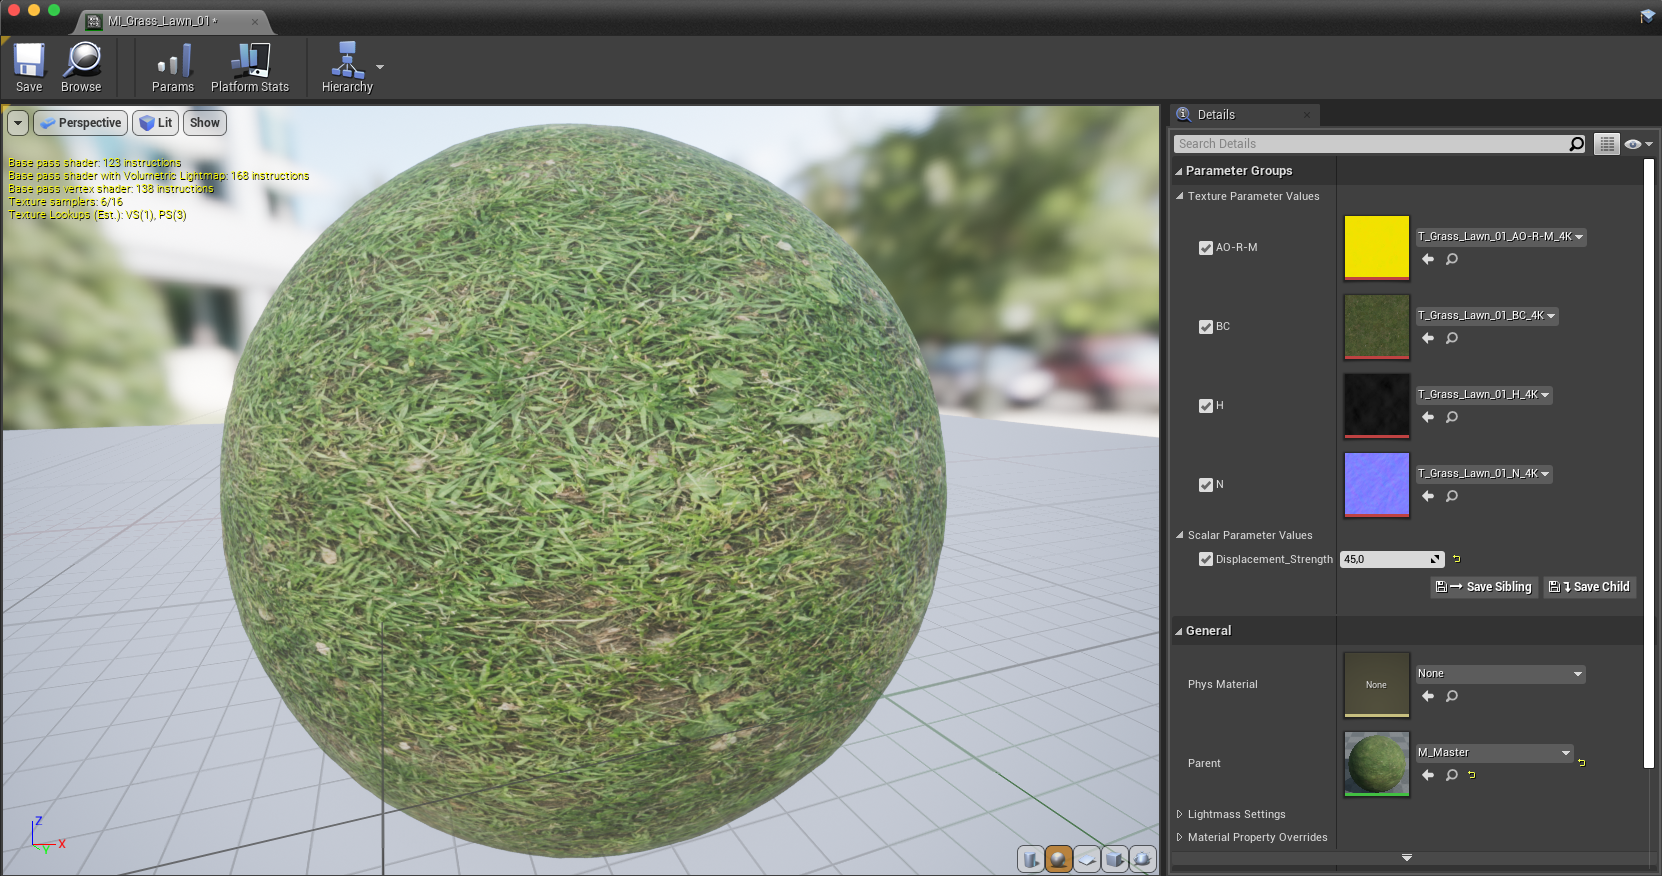
With the Material Instance open, check all the parameters which you want to alter the value of. With such a rudimentary Master Material, there is not much to alter except exchanging the textures, but since the default textures assigned in the parent Material (which the child inherits as default values) are the ones we intend for it, the only thing we can do is play with the Displacement_Strength value, to see the effect of the Displacement texture on the tessellated preview mesh.
If you have several Master Materials (e.g. one with Displacement, one without, one for baked textures, etc.), it is from here, under General, you may reassign the Parent of the Material Instance. Simply click on the title of the current Parent, and search for the Master Material you want to re-parent to.
For all intended reasons, the tutorial might have stopped here, with everything necessary to know about implementing linear OpenEXR material texture files in an Unreal Engine material already shared. The tutorial was arguably of paramount around the Bulk Edit via Property Matrix, but has since snowballed (with the tendency well established early on), so we might as well continue on a little bit further.
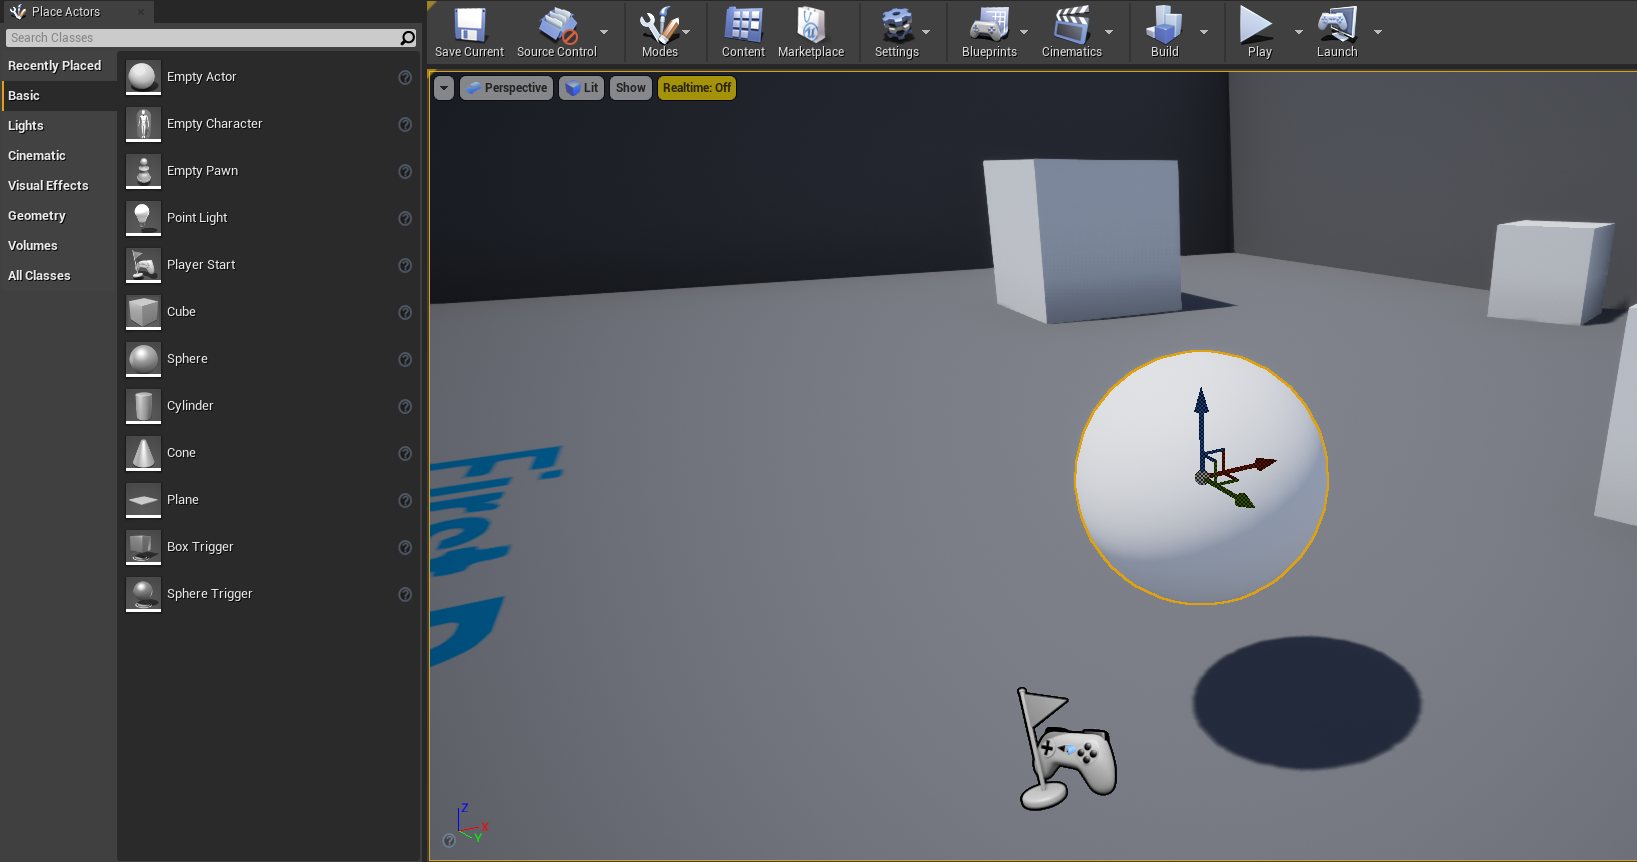
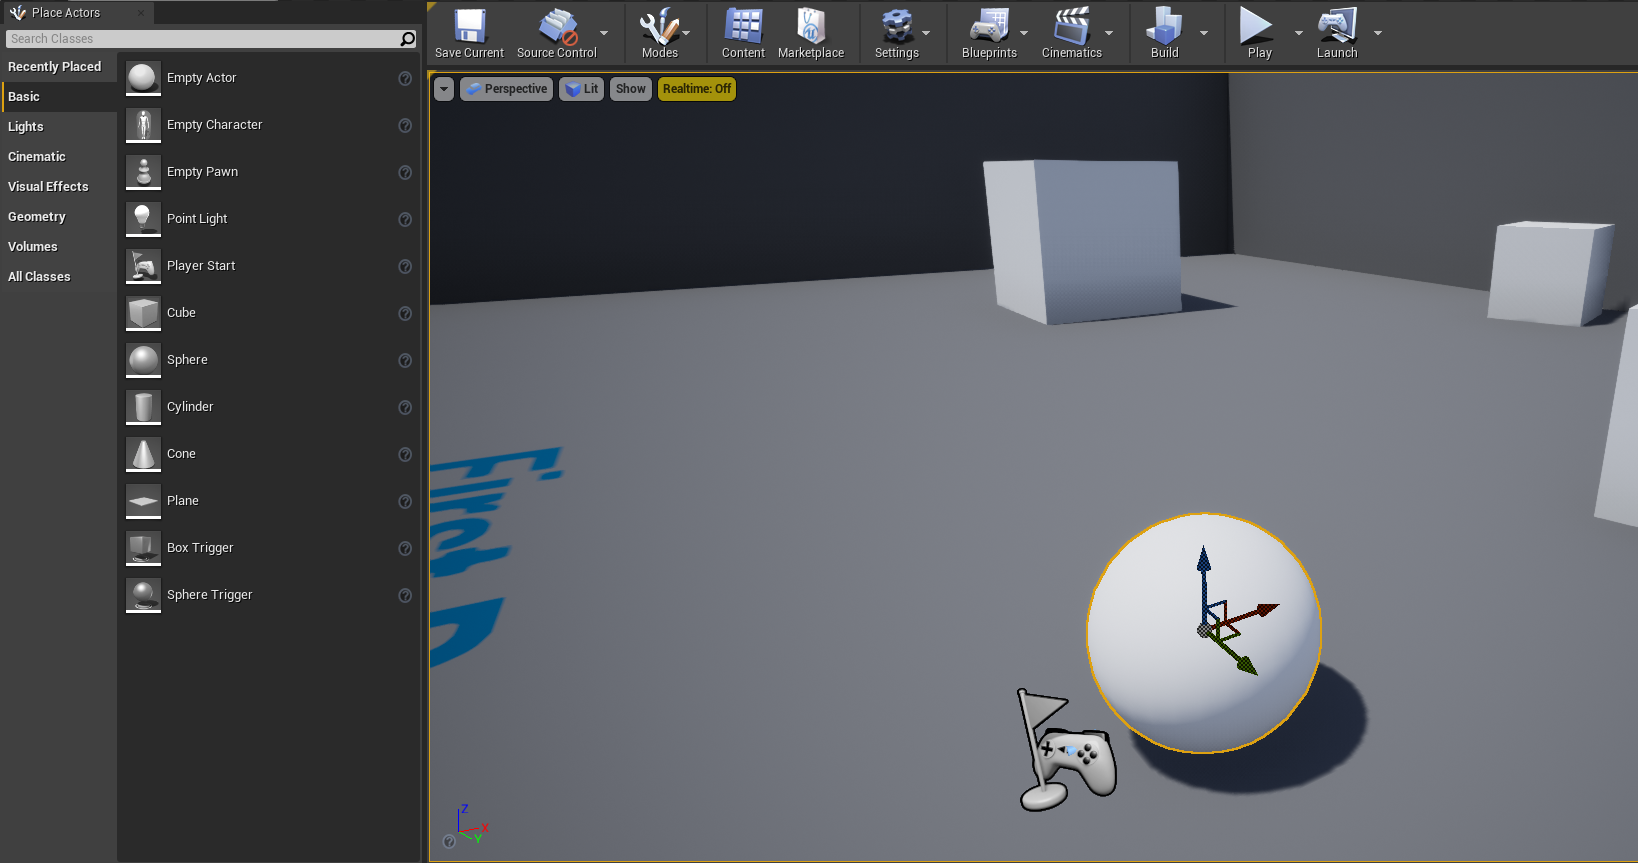
With the Place Actors pane open, and the Basic category selected, click-and-drag out a Sphere into the level.
With the placed sphere mesh selected, press END to position the sphere on the floor. This command works for all meshes with proper collision set up (it simply moves the selected mesh down in the world space's Z-axis to the point where the mesh's collision is obstructed by the collision of any mesh underneath). If the sphere does not move, it might already be colliding with another mesh (for this template, any of the cubes, perhaps) – move it around a bit with the XYZ gizmo, and try again. Also, if there is no collision set up for the mesh, it will not work at all.
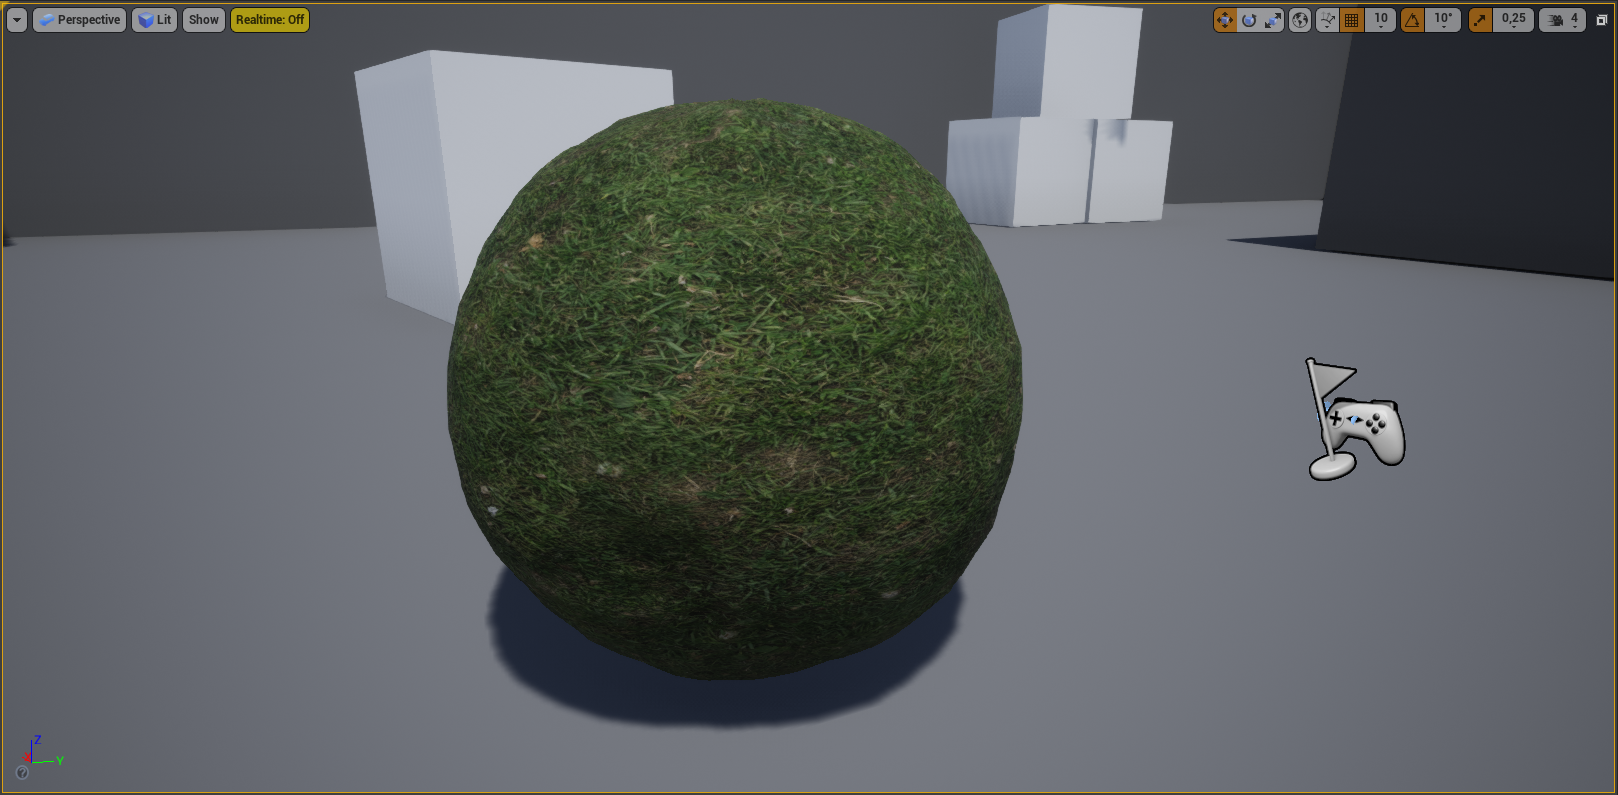
There are several ways to assign a material to a mesh. The most straightforward – if the folder of the material is open in the Content Browser, and the mesh in question is visible in the viewport – is to simply click-and-drag the Material Instance to the mesh, and release the mouse button. With the Material Instance assigned, any changes to the Material Instance (i.e. altering of values of the inherited paramaters) will be immediately reflected on the rendering of the mesh.
To create another Material Instance, with the same parent as the one previously created, either RMB-click the Master Material and Create Material Instance again, like you previously did, or RMB-click the Material Instance to select Duplicate (alternatively, CTRL+W with it selected will do the same thing). Rename the new Material Instance appropriately, and import a new set of textures in the same manner you previously did.
With the new Material Instance open, check the parameters whose values you want to alter, and drag-and-drop the new textures into the relevant texture parameter slots. Adjust the Displacement_Strength if necessary.
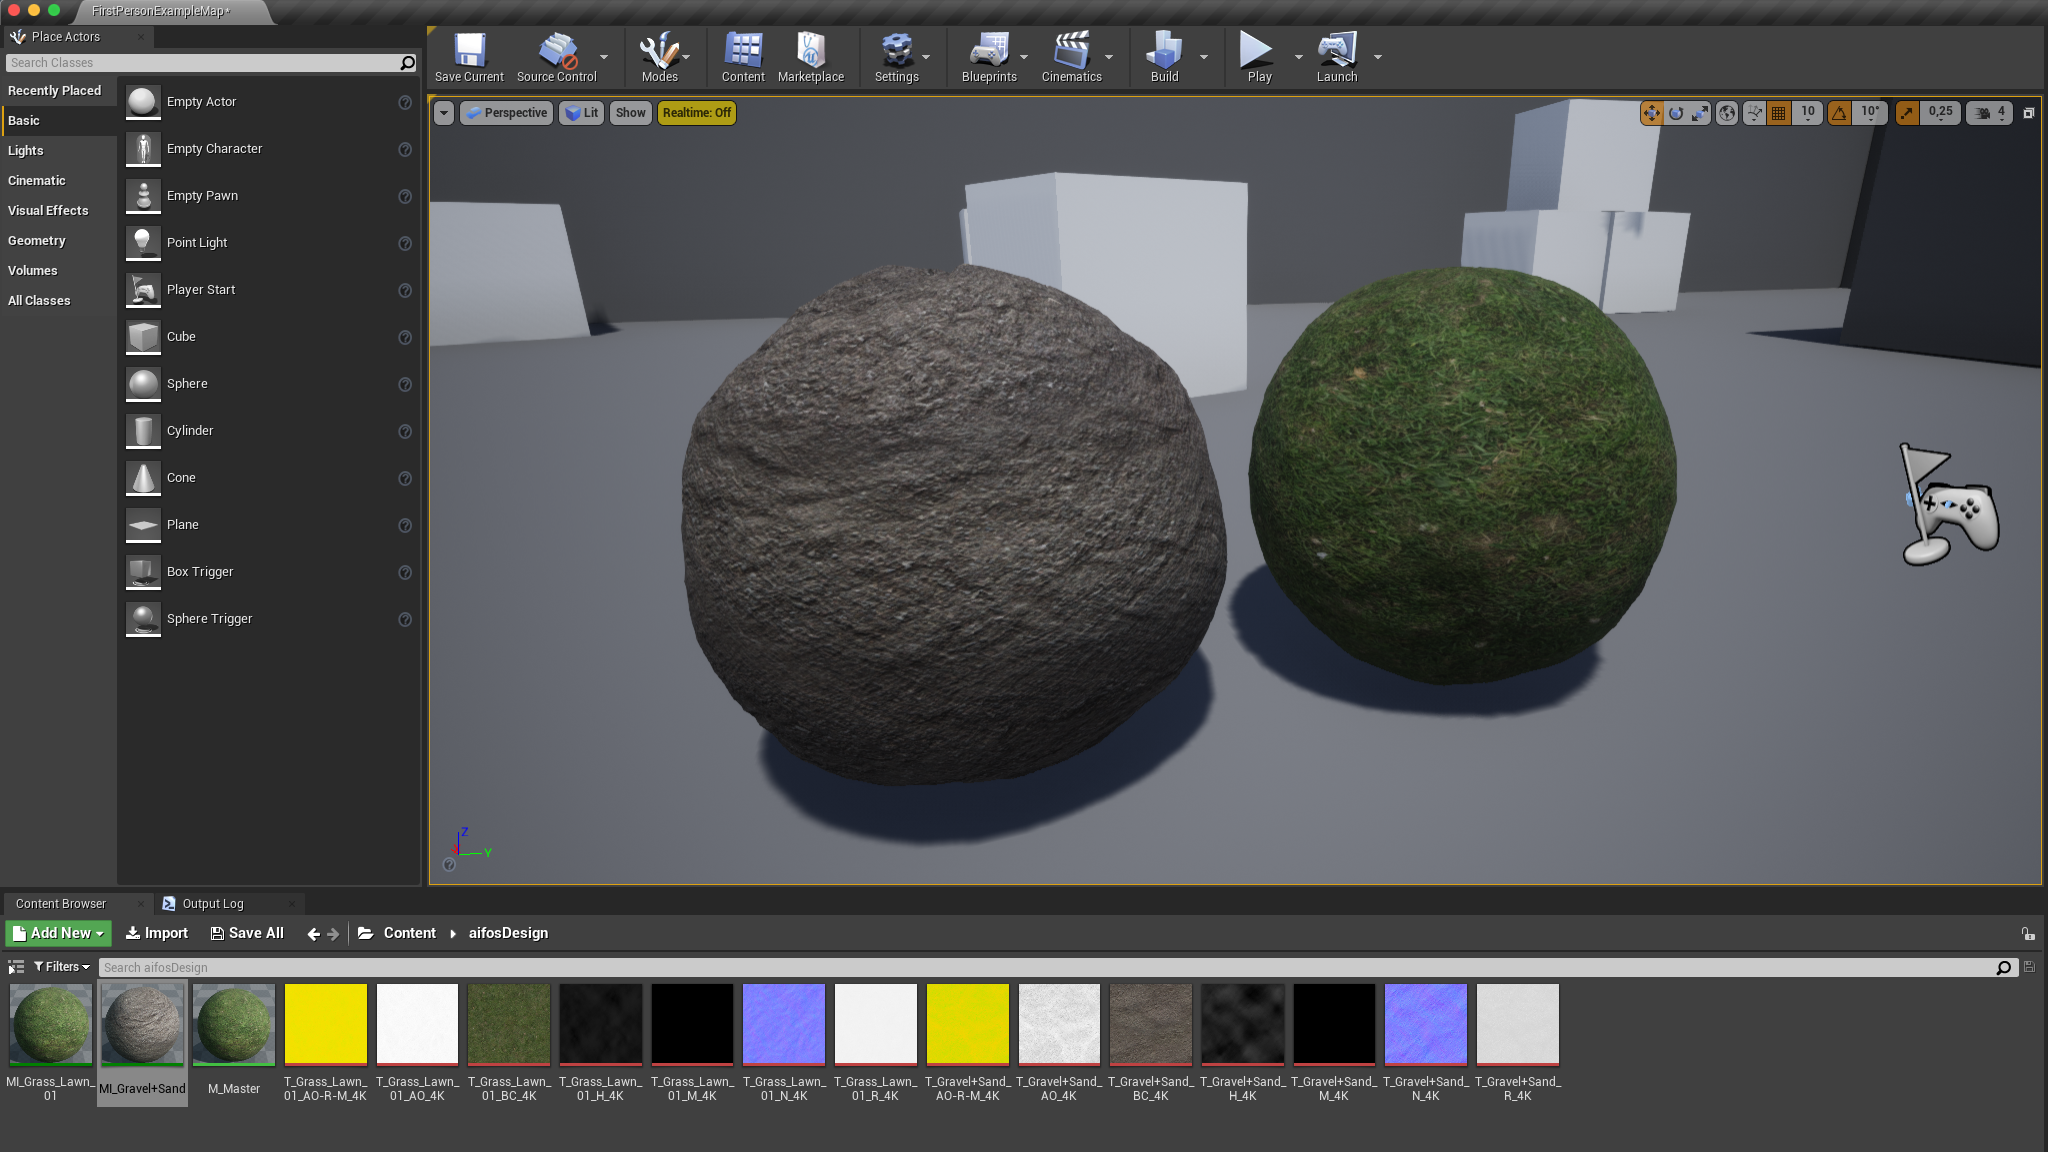
Select the previously placed sphere, and hold ALT while dragging along one of the axes of the gizmo to create a duplicate of the mesh. Drag-and-drop the new Material Instance onto the copied mesh, and voilà: you now have created two Material Instances with the same Master Material parent, and assigned them to two separate meshes.
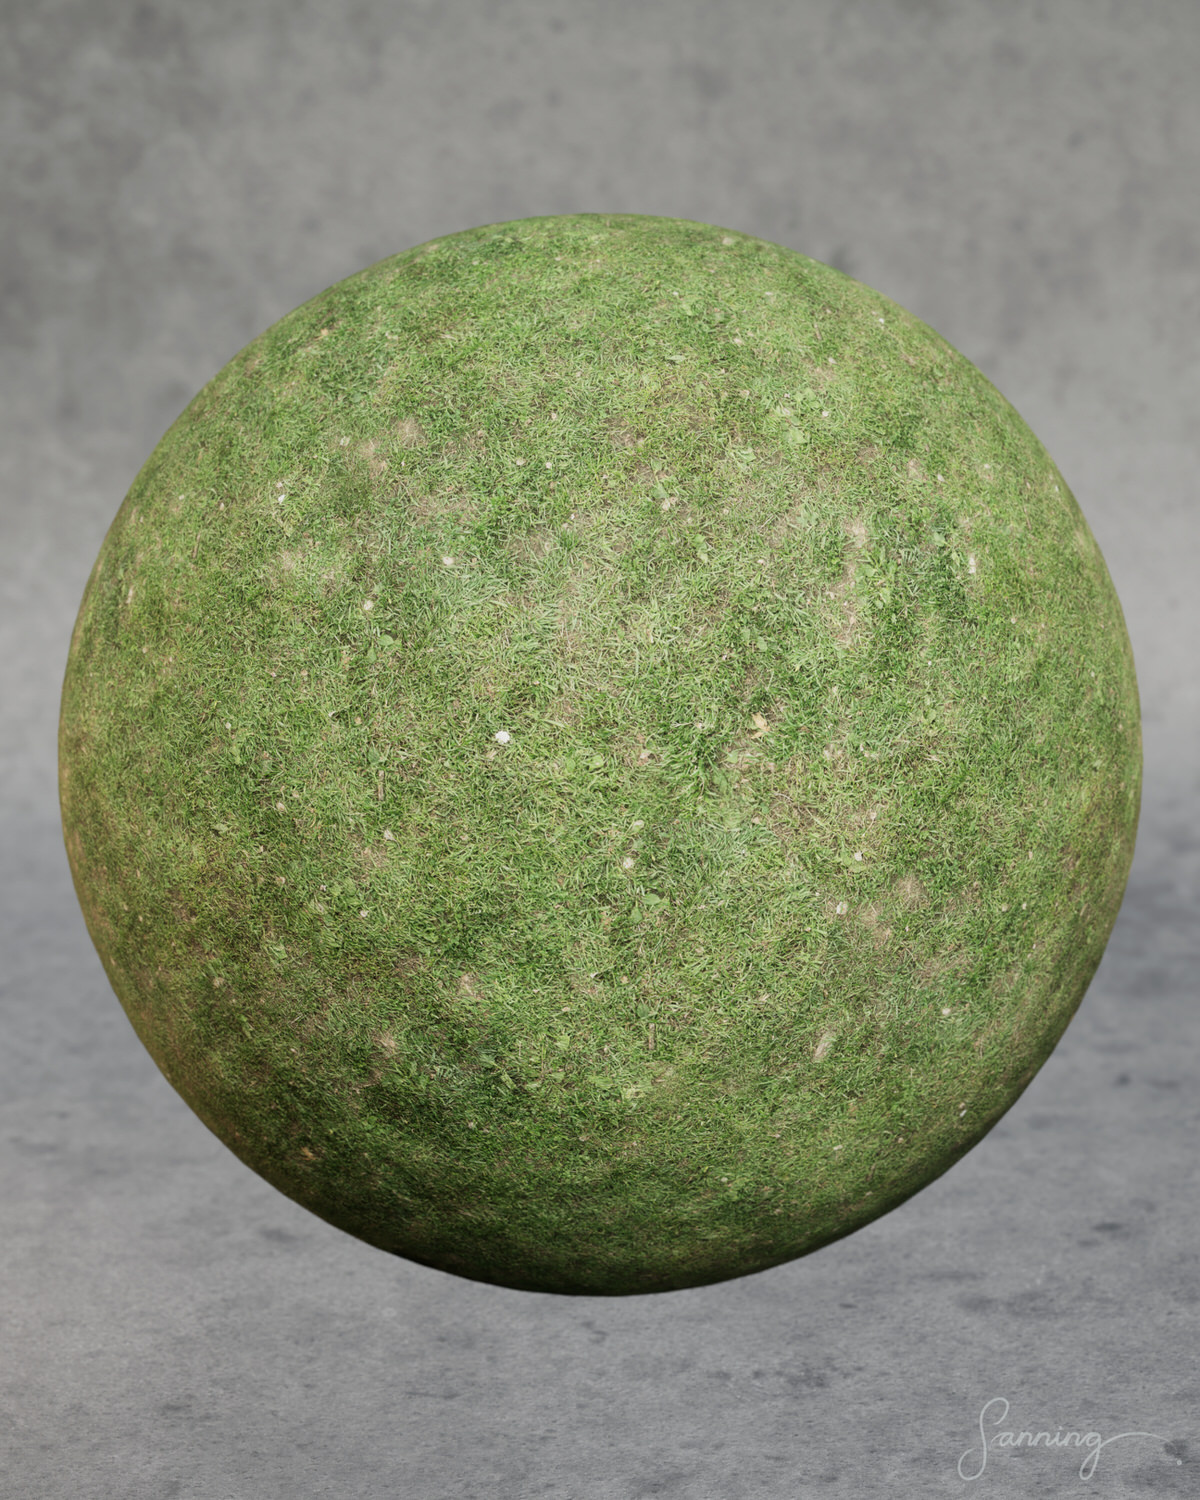
One may with good reason state that the materials rendered in above screenshot does not look as good as the preview renders presented with the products (example shown below). This is no mystery nor surprise – the rendering of a material is of course essentially dependent upon the quality of the material textures, but camera settings (exposure, depth of field, etc.) and lighting is equally important for capturing the scene in an aesthetically pleasing way. One can see, in the above screenshot, that within the same First Person template project, Unreal Engine's native thumbnail generator presents a much more pleasing representation of the material (look at the icon in the Content Browser) than what it by default achieves in the viewport of the First Person template project.
For the material textures preview renders, significant measures of time have been poured into the effort of making the material look its greatest. A directional light acts as a key light, accompanied by a warmer fill light and rim light, as well as a "chin light" to diminish the shadowing of the lowest area. An HDRI (namely, HDRI – Large Lawn (Summer, Midday)) contributes to the Global Illumination. The spherical mesh has Cast shadow disabled, so as to make it look likes it is floating in the scene. This settled the conflict between (0.0) the lack of lighting reference for a transparent-background solution and (1.0) the inadvertent and distracting focal point of the shadowing of the concrete stage for a naturalistic solution with (0.5) a compromise where the distracting shadow was eliminated, but the reference lighting of the concrete stage retained, thanks to Unreal Engine's versatility. The cinematic camera used has a very large aperture, yielding a shallow depth of field, and the exposure has been fine-tuned to the intensity of all light sources. Unreal Engine's Movie Render Queue is used to produce the highest-quality render possible on our workstation.
Although using a Material Instance parented to a much more complex Master Material than the example in this tutorial, the values of the textures themselves are equally unadjusted (e.g. there is no brightening of the Base Colour, no adjustment of the Roughness, etc.) and presented as is. So the difference in presentation is not because of a difference in texture values or material parameters, but a different level of effort with the cinematic camera, lighting and rendering settings. All of which we would be glad to share bits of knowledge about as well, but that will have to be the topic of a different tutorial, because this one is coming to an end.
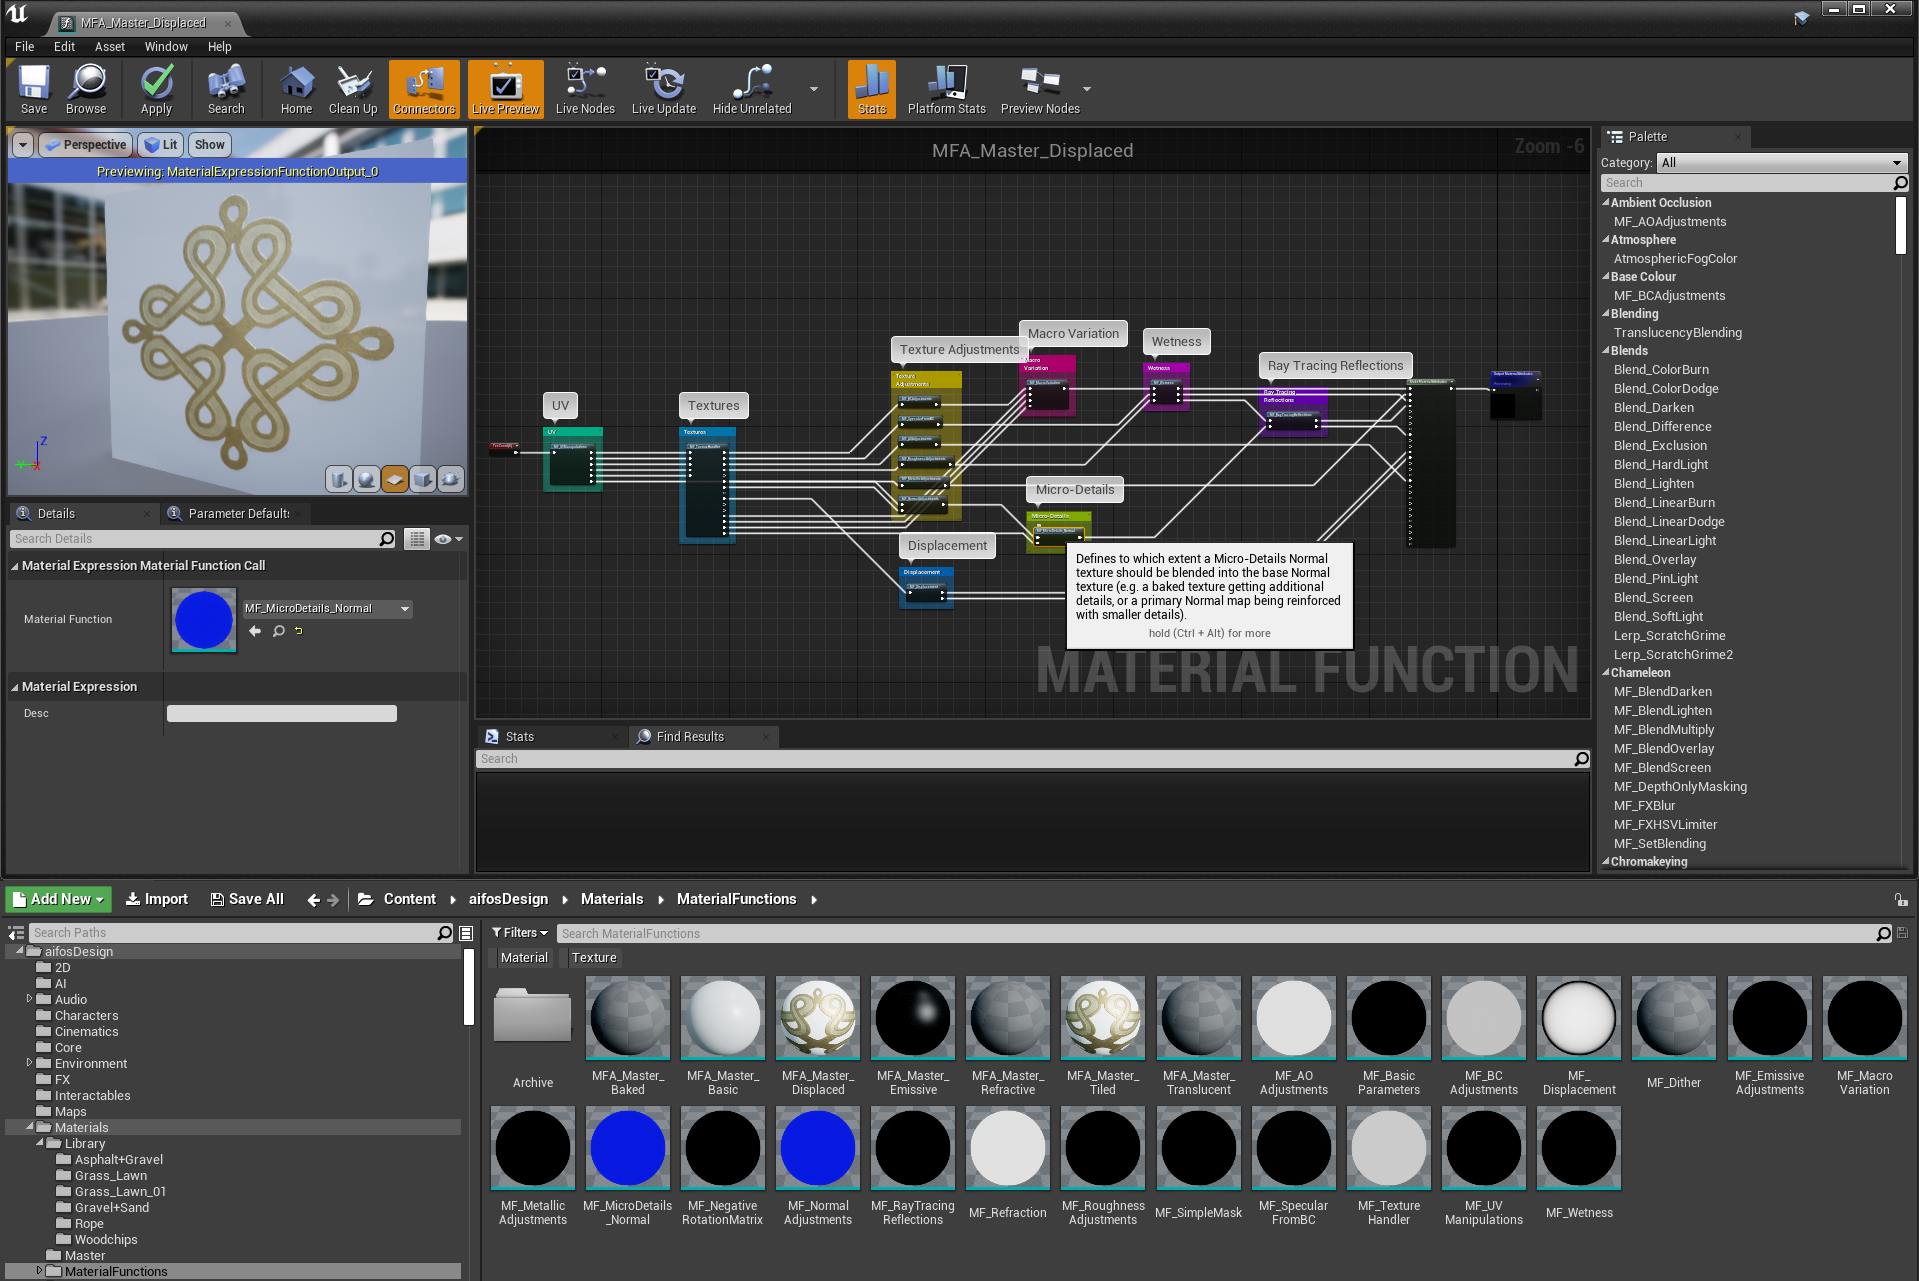
For transparency, this is an overview of the Master Material used for the preview renderings of the material. As complex as it might look (and surely is), with the default settings, and optional features disabled, the output of the textures' values are comparable to those of the tutorial's rudimentary Master Material, attributed to both materials' dependency on their input textures.
The authoring of a Master Material is an art, and balancing versatility and performance is not an easy feat. We have yet to complete the set of complex Master Materials we began working on two and a half years ago (!) and which have been actively worked upon for many weeks, but we hope to publish them on the Unreal Engine Marketplace in the foreseeable future, together with other aifosDesign content.
If you encounter any issues, please write a comment below, and we will do our best to solve the problem.
Recommended tutorials to continue with:
Placeholder Tutorial
If you would like to return to the overview of our tutorials, please click here.
